Your lights have been designed to be set-up and operated from your smartphone. To get started, download the control app from iTunes or the Google Play store.


Product Installation

This product must only be installed by a qualified electrician and comply with local installation regulations.


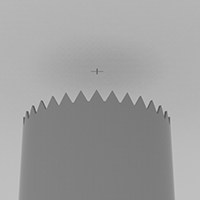
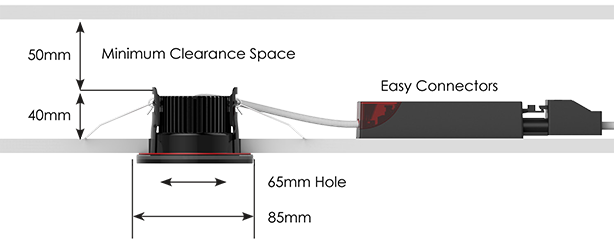
Mark the desired light position and carefully cut out a 65mm hole.


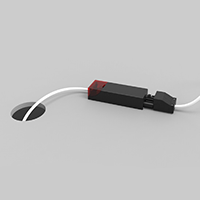
Wire the easy connector head into the mains circuit according to the wiring diagram below.
Push the easy connector head together with the product driver, ensuring a secure connection is made.


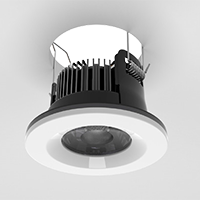
Retract the spring arms and push the light into position.


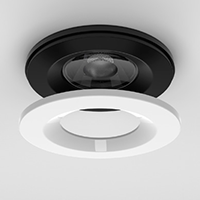
Attach your preferred magnetic bezel to the face of each light.


Wiring Diagram & Space Requirements


App Set-Up

Your lights have been designed to be set-up and operated from your smartphone. To get started, download the control app from iTunes or the Google Play store.

App Overide

The lights can be controlled from the wall switch installed on the same lighting circuit that your Spectrum lights are also installed on.

Switch ON/OFF within 5 seconds - to overide the app settings and cycle the main spotlight colour temperature between warm white, cool white or daylight.

Factory Reset


The first time your new lights are turned ON they will remain discoverable for 5 minutes. After this time, the lights will automatically lock and will no longer be shown in the Bluetooth search. To reset lights, follow these steps.


Warning – Reset will remove the lights from the current network as well as any groups, actions or events you have previously created.


  • Turn the lights ON at the wall switch for 15 seconds.
  • Turn the lights OFF for 1 second.
  • Turn the lights back ON for 15 seconds.
  • Turn the lights OFF for 1 second.
  • Turn the lights back ON for 15 seconds.
  • Turn the lights OFF.

The next time the lights are switched ON they will flash continually to indicate they are available for pairing and the factory reset is complete.


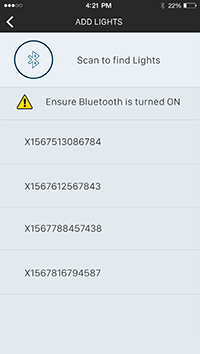
Available Lights
Displayed

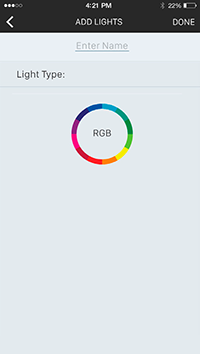
Enter a
Light Name

Adding Lights to the Network


To add new lights to the Bluetooth network, follow these steps.

  1. Ensure that your smartphone or tablet Bluetooth function is switched ON.
  2. Turn the lights ON at the wall switch.
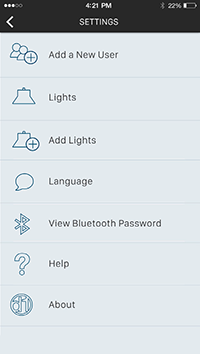
  3. Open the settings menu and select “Add Lights”
  4. A scan will start automatically and all unpaired lights will be listed.
    If no lights are listed and they are not already paired to the network, please follow the factory reset instructions below.
  5. Select a light from the list. The corresponding light fitting will stop flashing.
  6. Enter a name for the light for easy identification.
  7. Confirm the name and repeat the naming step for all remaining lights.


Settings
Menu

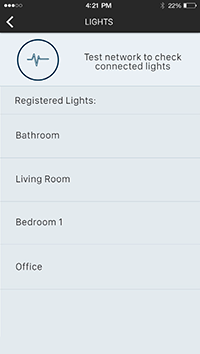
List of
Registered Lights

Editing a Light Name

  1. Open the settings menu and select “Lights”.
  2. From the list of network lights, press and hold the name of the desired light you want to edit.
  3. The control app will then display the light set-up screen where the light name can be edited.

Network Test

To identify which lights are connected to the Bluetooth network and to test for faults you can perform a network test. To perform a network test, follow these steps.

  1. Open the settings menu and select “Lights”.
    A full list of lights connected to the network will be displayed.
  2. Press the ‘test network’ icon. Lights that are connected to the network will flash. Lights that do not flash are not connected to the network.
  3. Follow the instructions above to add lights to the network.

Groups

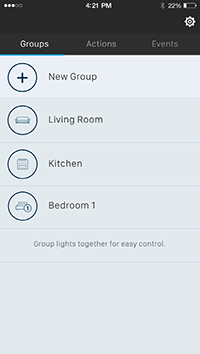
The groups function allows you to group individual lights so they can be controlled together. For example, a single room, parts of a room or even full floors or buildings.


Tip - Lights can be assigned to multiple groups.


Groups
Home Page

New
Group

Creating a Group

To create a new group, follow these steps.

  1. On the groups home screen select “New Group”.
  2. Type a name for the new group and optionally assign an icon or an image.
    Several preset icons are available, however you can also use your own images.
  3. Select the lights to be grouped from the list presented.
    The selected lights will turn ON to indicate they have been selected.
  4. Confirm your group and return to the home screen.

The group will now be displayed under the Groups tab on the home screen.

Editing a Group

To edit a group, press and hold the group name. The control app will then display the group set-up screen where you can edit the group name, image and the lights assigned to the group.


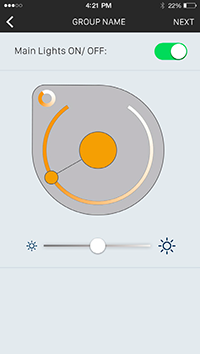
Main
Light Control

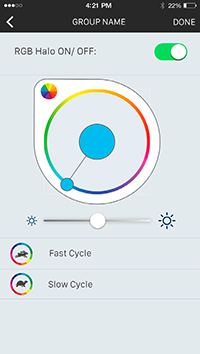
RGB Halo
Light Control

Group / Individual Light Control


When you select a group from the list, the lights will automatically turn ON and the light control panel will be displayed.

Main Light Control:

  • Use the ON/OFF toggle to turn the main light ON or OFF.
  • Use the colour wheel to set the main light colour.
  • Use the brightness slider to set the main light brightness.
  • Confirm these settings to progress to halo light control.

Halo Light Control:

  • Use the same controls to set the halo colour and brightness.
  • Note: If you have grouped lights with RGB and White halo lighting together,
  • two halo light control screens will be displayed (one for each type of light).
  • Confirm the new light settings and return to the home screen.

Actions

The actions function allows you to save common light settings for quick and easy application later. For example, an action could be created to quickly turn all lights OFF when leaving the house, or one could be created to dim lounge lights for watching movies.


New Action
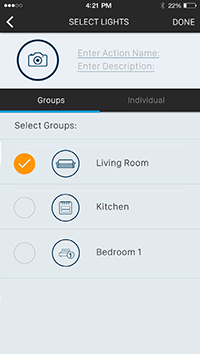
Selecting Groups

New Action
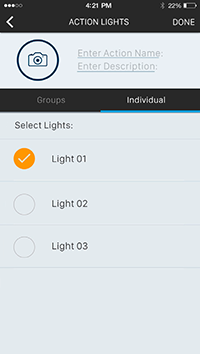
Selecting Lights

Creating an Action


To create a new Action, follow these steps.

  1. On the actions home screen select “New Action”.
  2. Type a name for the new action and optionally assign an icon or an image.
    Several preset icons are available, however you can also use your own images.
  3. Select individual lights or groups from the list that you want the new action to apply to. The selected lights will turn ON to indicate they have been selected.
  4. Set the desired colour and brightness for the lights (see instructions on page 14). Confirm your action and return to the home screen.
    The action will now be displayed under the Actions tab on the home screen.


Editing an Action

To edit an action, press and hold the action name.

The control app will then display the action set-up screen where you can edit the action name, image, assigned lights and light settings.


Applying an Action

On the action menu, tap twice on the action name to apply it.

The first tap will turn the lights OFF.

The second tap will apply the action light settings.


Events

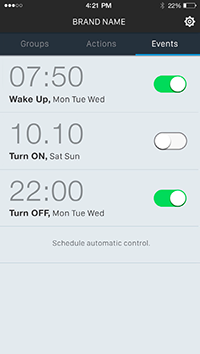
The events function allows you to schedule individual lights or groups of lights to turn ON or OFF at specific times.

There are three types of event that can be scheduled:


Wake Up Slowly increases the brightness of selected lights at a set time to help you wake up naturally. The lights will switch ON 15 minutes before the set time and gradually build up to full brightness.


Turn ON Turn selected lights ON at a specific time with a preset brightness and colour.


Turn OFF Turn selected lights OFF at a specific time.


Note: Events will only take place if the lights are left powered ON at the wall switch. You can still turn the lights OFF using the control app.


Events
Home Page

New
Event

Creating an Event


To create a new event, follow these steps.

  1. On the events home page select “New Event”.
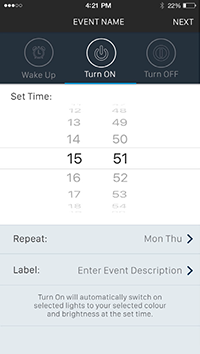
  2. Select the event type from the 3 options presented.
  3. Set the event time (note wake up will start 15 minutes before the set time).
  4. Select days of the week for the event to repeat.
  5. Enter a name for the event and press next.
  6. Select the lights or groups of lights the event will apply to & press done / next.
  7. Set the desired brightness and colour for the lights and confirm settings. (Applies to “Turn On” Events Only)

The event will now be displayed under the Event tab on the home screen.


Editing an Event

To edit an event, press and hold the event name.

The control app will then display the event set-up screen where you can edit the event settings.


Applying an Event

Events can be toggled ON or OFF on the Events home screen.

Events that are turned ON will happen automatically at the preset time.

Note: Events will only take place if the lights are left powered ON at the wall switch. You can still turn the lights OFF using the control app.


Additional Settings

Language

Available languages can be selected from the Languages page.

View Bluetooth Password

For security purposes your device may ask for a Bluetooth password.

This can be accessed under “View Bluetooth Password” in the settings menu.


Primary User
Password

New User -
Enter Password

Adding Additional Users


For security purposes, when lights have been added to a network they are locked. This means new users are not be able to add or control lights using different devices without authorisation.

To authorise a new user, follow these steps.

  1. Download the control app onto the new user’s smartphone or tablet.
  2. On both devices, open the settings menu and select “Add New User”.
    Select which device is the primary user and which is the new user.
    Note: Only the first device added to the system can select ‘Primary User’
  3. The primary user’s control app will now display a QR code.
    Using the new user’s device, scan the QR code.
  4. Press next on the primary users device. The Bluetooth password will be shown.
    Enter the password on the new users device.
  5. Confirm settings and exit to main menu.
  6. The new user can now control lights from their device.


Manual Override of Smartphone Controls


In normal operation - if the Spectrum downlight is switched off/on via a wall switch, the downlights remember the last setting which was applied to them via smartphone control app.

However, there is a manual override function that can control operation of the lights without the use of the smartphone app. This is especially useful in emergencies or when access to the smartphone is not available.

To manually override the Spectrum downlight, follow these steps.

  1. Switch the Spectrum downlight OFF at the wall switch for 2 seconds.
  2. Switch the Spectrum downlight ON at the wall switch.
  3. The Spectrum downlight will now illuminate only the inner spotlight in at full brightness and teh ambient halo rim will be switched off.
  4. The Spectrum downlight can be cycled through 3 available colour temperatures, by switching the Spectrum downlight OFF for 2 seconds and then switching back ON:
    1. 3000K Warm White.
    2. 4000K Cool White.
    3. 6000K Daylight.
  5. After 20 seconds of illumination - the current colour temperature will be saved into the Spectrum downlight's memory and will be used when the lights are next switched off and back on.
  6. To change the colour again; repeat steps 1-4 or take control of the Spectrum downlight via the smartphone control app.